What is a Tensiometer? The Scientific Basis of Measuring Soil Moisture
The key to success in modern agriculture lies in providing the water the plant needs at exactly the right time and in the correct amount. Making irrigation decisions by looking at the top surface of the soil with traditional methods often does not reflect the actual situation in the root zone. This is where tensiometer technology comes into play. A tensiometer is a device that measures the soil's water-holding capacity (matric potential) and directly shows how much energy plant roots spend to draw water.
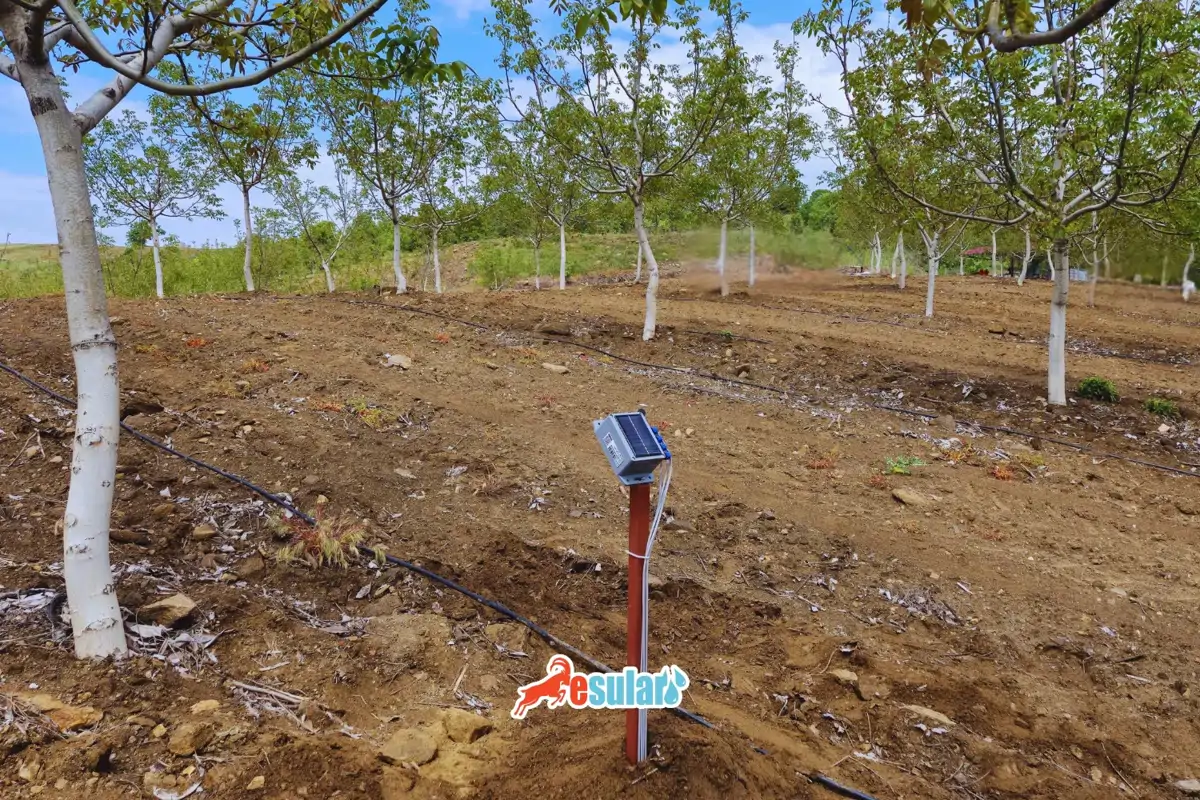
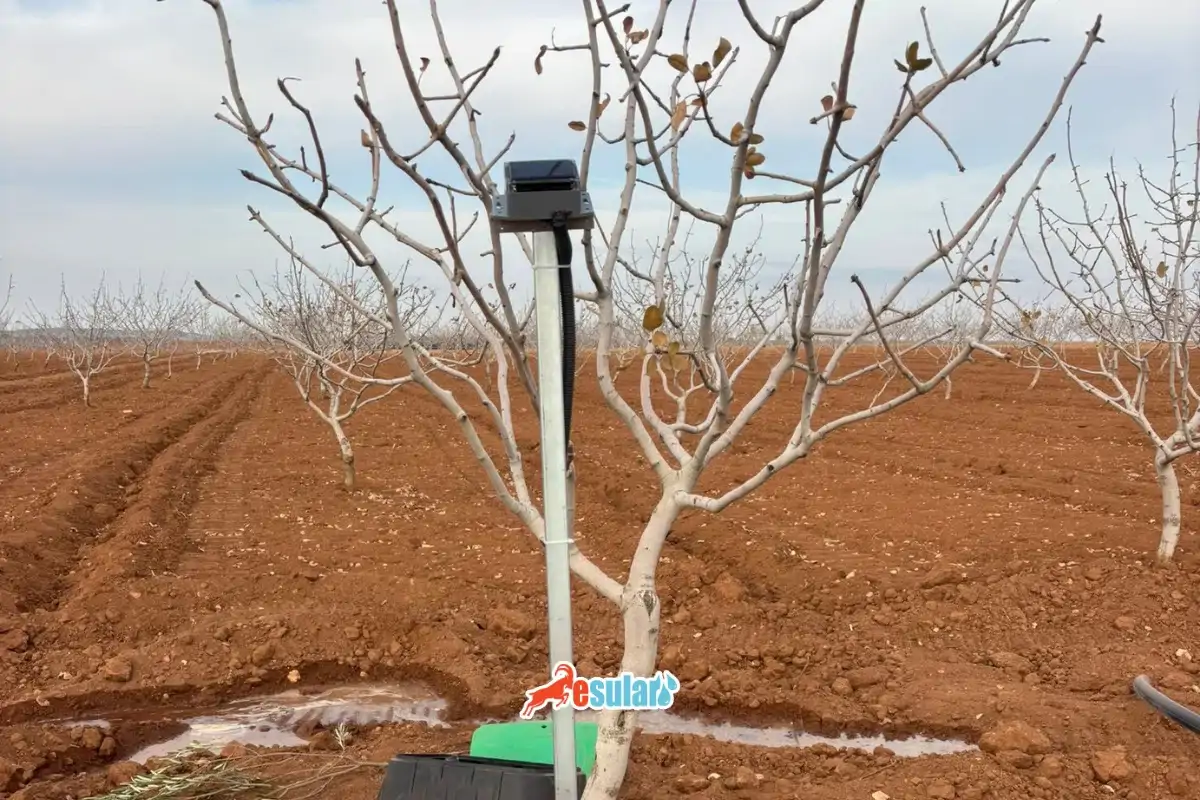
As Esular, we believe in the power of digitalization in agriculture. We transform the valuable data offered by classic tensiometers into digital tensiometer solutions by combining them with our pressure sensor and IoT infrastructure. In this way, our farmers can now monitor soil moisture instantly from their phones or computers without going to the field.
Key Benefits of Using a Tensiometer:
- Provides continuous monitoring of soil moisture depending on product needs.
- Prevents water and fertilizer (nutrient) waste caused by over-irrigation.
- Guarantees that the optimal water level is always present in the root zone.
- Increases product quantity and quality by minimizing plant stress.
- Provides significant savings in water, energy, and labor costs.
Working Principle of the Tensiometer: Vacuum and Balance
The working logic of the tensiometer is quite simple yet extremely reliable. The device consists of a tube filled with pure water, a vacuum gauge, and a porous porcelain (ceramic) tip in contact with the soil. The water inside the tensiometer seeps out through the ceramic tip until it reaches equilibrium with the water content in the soil. In the equilibrium state, the water tensions in the soil and the device are equal to each other.
As the water in the soil is used by plants or decreases through evaporation, the soil forces the water inside the tensiometer to be pulled out. This creates a vacuum (negative pressure) inside the tube. The drier the soil, the higher the vacuum value. When irrigation is performed, the process reverses; the water given to the soil exerts pressure toward the device, and the vacuum value decreases. This physical process directly simulates the suction force to which plant roots are exposed.
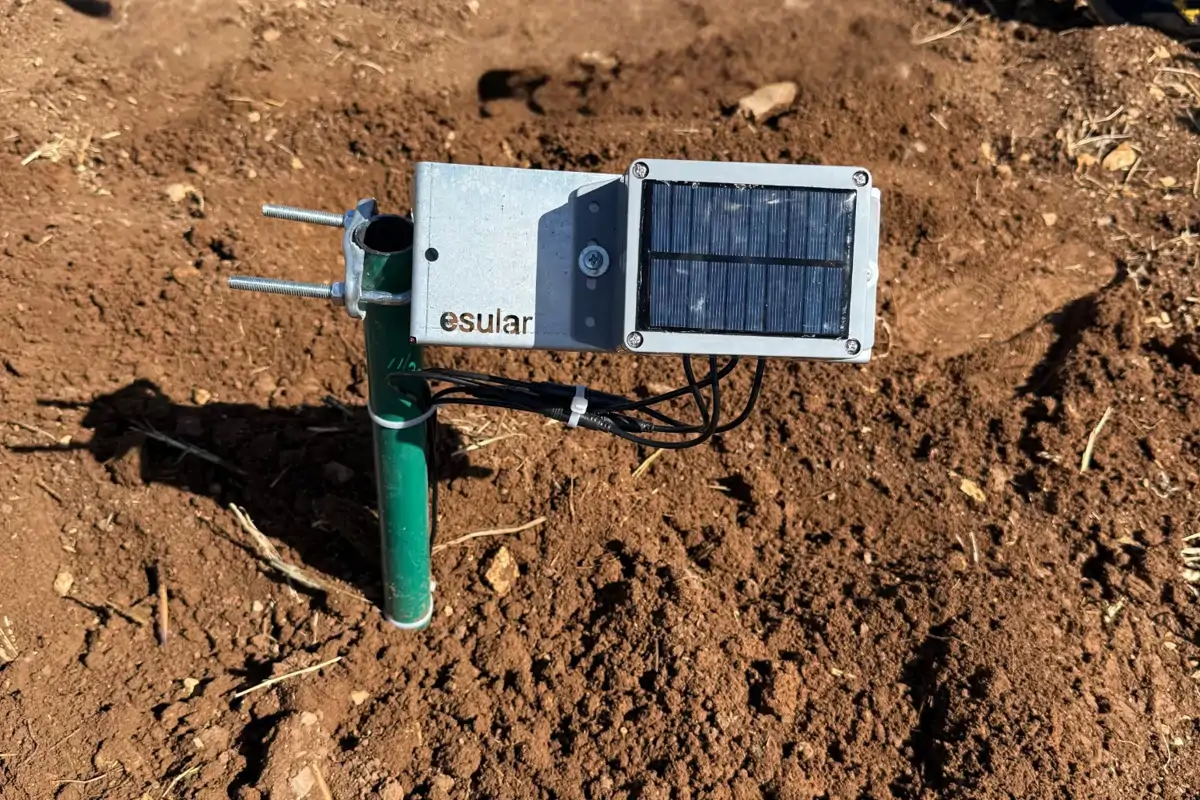
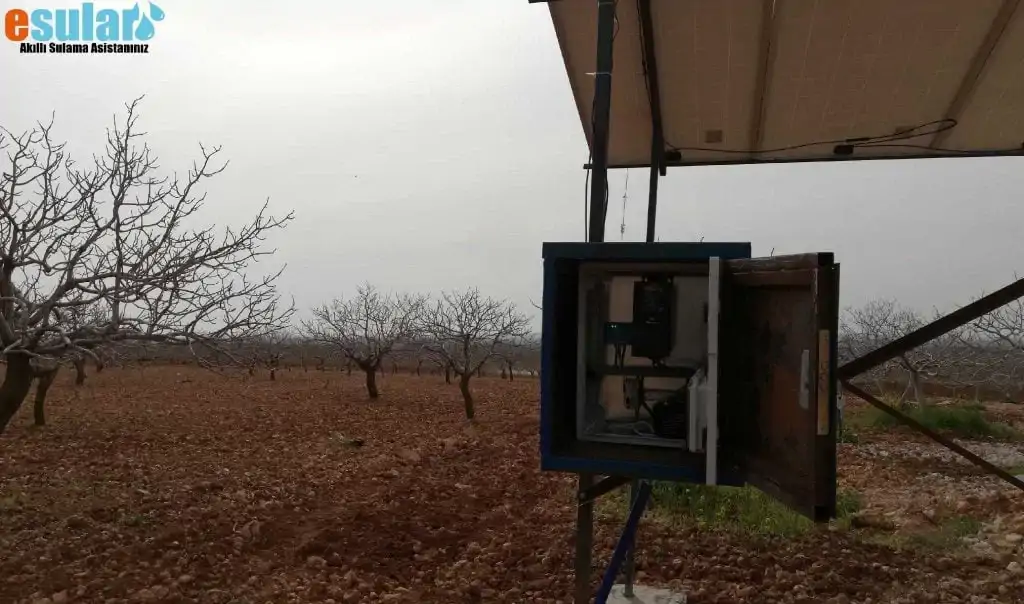
Esular Smart-Pressure: The Era of Digital Tensiometers
In classic tensiometers, it is necessary to go to the field every day to check the gauge and record this data manually. However, in large areas, this creates an unmanageable workload. Esular solves this problem with Smart-Pressure sensors.
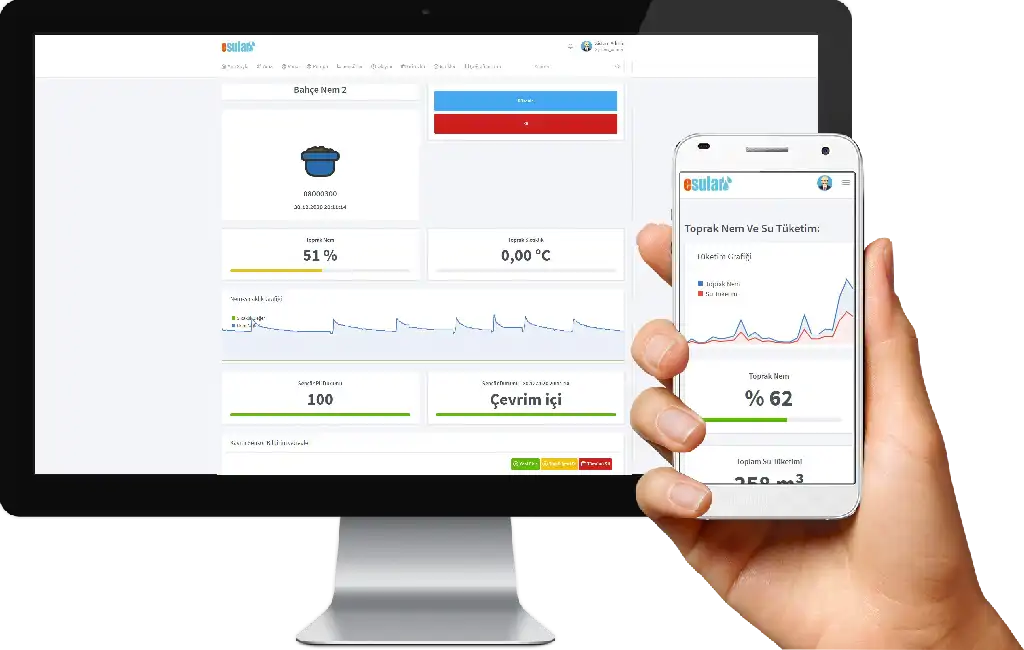
In the Esular digital tensiometer system, high-precision digital pressure sensors are placed instead of the vacuum gauge. These sensors measure vacuum changes inside the tube instantly and transmit the data to the cloud system by working integrated with wireless valve control units. Farmers can see the soil's value in cbar (centibar) or kPa (kilopascal) through graphs via the Esular mobile application.
Why Should You Use a Digital Tensiometer?
- Instant Tracking: Data is transmitted to the center instantly, with no delays.
- Automation Integration: The irrigation system can start automatically when soil moisture falls below a certain threshold.
- Historical Data Analysis: You can plan for the following year by reporting the moisture changes of the soil throughout the season.
- Precision Measurement: Provides digital reading working with 0.1 precision, eliminating human error.
Tensiometer Types and Depth Selection
The root depth of plants varies according to the product type and growth stage. Therefore, tensiometers are produced in different lengths:
For plants where the root depth exceeds 45 cm, it is generally recommended to measure at two different depths. The first tensiometer should be placed at 25% of the total root depth, and the second at 75%. This method allows you to control both the moisture of the active root zone and whether water is seeping into the lower layers.
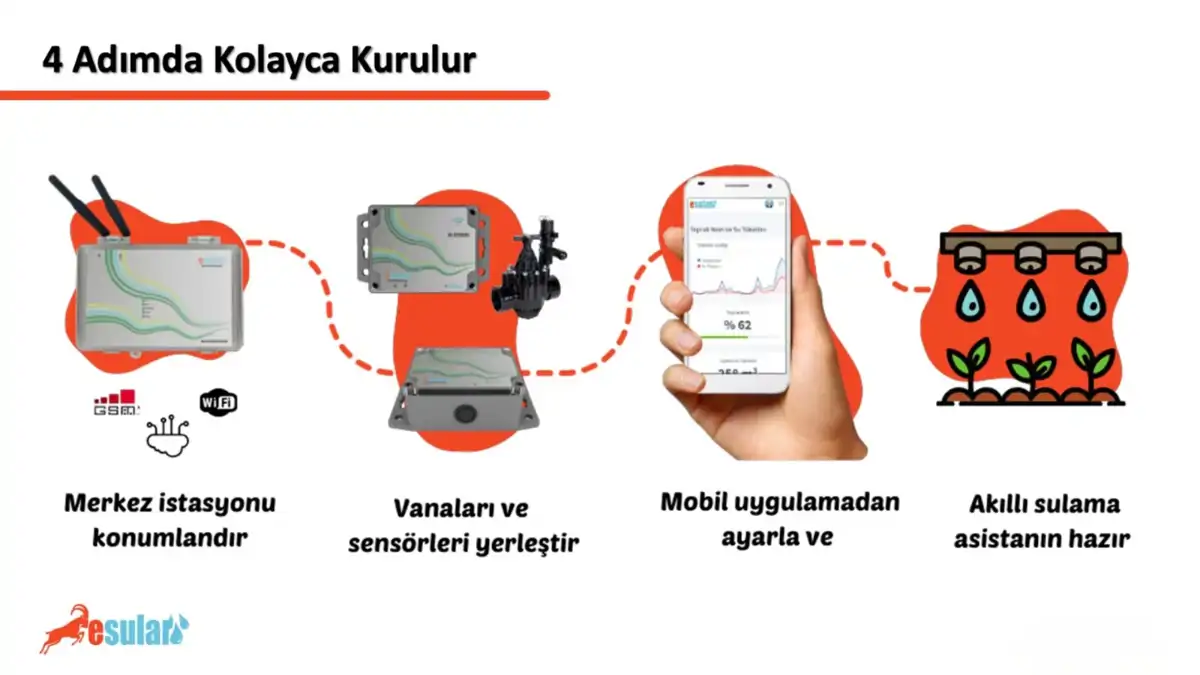
Step-by-Step Tensiometer Preparation and Installation Guide
The preparation process before installation is critical for the tensiometer to provide accurate data. Incorrect installation causes air to enter the tube and leads to wrong readings.
Step 1: Preparation Process
Follow these steps before taking the tensiometers to the field:
- Remove the top caps of the tensiometers.
- Fill them with pure water (or boiled, rested clean water).
- Without closing the caps, place the ceramic tips in a container so they are completely submerged in water and wait overnight. This process ensures the ceramic pores become fully saturated.
- The next day, remove the tensiometers from the water and tighten the top caps firmly. This will prevent the tip from drying out.
Step 2: Installation (Placement)
What you should pay attention to when installing at the selected monitoring point:
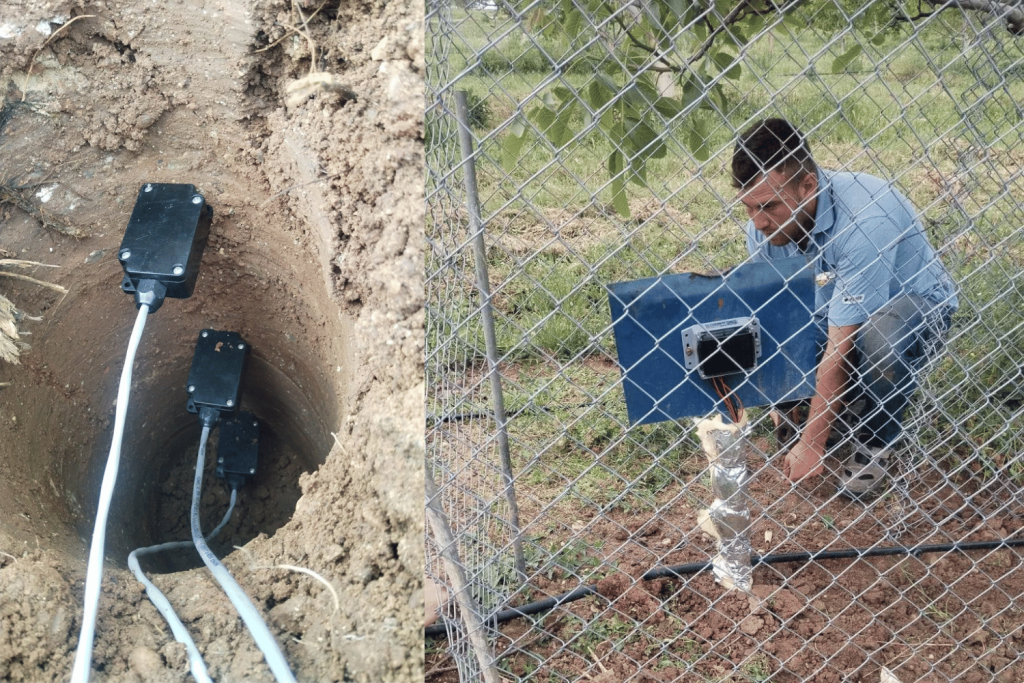
- Prepare a hole suitable for the depth to be measured using a 2.2 cm diameter borer (auger).
- Open the cap of the tensiometer and fill the tube completely with pure water.
- Place the device into the hole you prepared. Critical Note: The ceramic tip of the tensiometer must sit exactly at the bottom of the hole. If a gap remains between the soil and the ceramic tip, measurement cannot be performed.
- Ensure the vacuum gauge (or digital sensor) remains at least 3 cm above the soil.
- Lightly compact the soil around the hole to prevent surface water from seeping directly down along the tube.
Step 3: Protection and Storage
Tensiometers are sensitive devices. The points where they are placed should be marked to prevent damage from vehicle traffic or animals in the field. In regions with frost danger, the vacuum gauges and the water inside the tube can freeze in winter and damage the device. Therefore, at the end of the season, the devices should be removed, cleaned, and stored in a place above freezing temperatures.
Site Selection Strategies According to Irrigation Methods
Where the tensiometer will be placed changes according to the irrigation system used. Incorrect placement leads to your entire irrigation strategy being faulty.
Furrow Irrigation
In furrow irrigation, the tensiometer should be placed at 2/3 distance of the irrigation furrow. The ceramic tip should be placed at a certain angle to come below the bottom of the furrow. This best reflects the speed and depth of water penetration into the soil.
Sprinkler Irrigation
In trees, tensiometers should be placed on the part of the tree that receives afternoon sun and along the irrigation line. The most important point to note is to ensure that dense branches and leaves do not prevent the water from the sprinkler head from reaching the point where the device is located.
Drip Irrigation
In drip irrigation systems, the tensiometer must be located within the wet zone (wetting pattern). In trees, it is ideal to place it on the side receiving afternoon sun, at a distance of 30-45 cm from the emitters. In micro-sprinkler or spray irrigation, this distance can be increased to 60-90 cm. Esular's wireless battery-powered soil moisture sensor solutions are perfectly compatible with drip irrigation lines.
Irrigation Tracking and Record Keeping: Turning Data into Profit
Looking only at instant values is not enough; the real success lies in analyzing the rate of change (trend) of these values over time. The rate of change in measurement results is the best indicator for determining when irrigation should be performed.
For example, if an increase of 10-15 cbar is observed in tensiometer readings within a few days, this indicates that the soil is drying out very quickly and the plant is starting to have difficulty accessing water. The Esular Vision system automatically graphs this data, presenting you with a "soil moisture photograph." By looking at this photograph, you can see the water loss in different soil layers and the dynamics in the plant root zone with a clarity that you cannot see with any manual method.
Record Period Recommendations:
- In sandy soils and hot climates: 2-3 times a week (Instant in digital).
- In temperate climates: Once a week.
- In very humid climates: At longer intervals.
When Should Irrigation Start? Critical Values (cbar/kPa)
Although it is not possible to give a single irrigation instruction for every product, climate, and soil structure, there are generally accepted threshold values for those using tensiometers. Values on the tensiometer gauge are usually in cbar (centibar) (1 cbar = 1 kPa).
Irrigation Start Values According to Soil Structure
Recommended irrigation start values for many products in hot and dry climates are as follows:
- Sandy Soils: 20 – 35 cbar
- Medium Density (Loamy) Soils: 30 – 50 cbar
- Heavy (Clay) Soils: 50 – 60 cbar
In cold and humid climates, these values can be 10-15 cbar higher. In methods where low-intensity and frequent irrigation is performed, such as drip irrigation, the soil moisture level should generally be kept between 10-20 cbar. This ensures that the plant never enters water stress.
Special Cases: Young Saplings and Saturation
In young tree saplings, the moisture level should definitely not drop to the 0-10 cbar level (saturation). A value of 0 cbar indicates that the soil is completely saturated with water and the roots cannot receive air. If this situation lasts long, diseases such as root rot may be triggered. Esular's climatic disease risk analysis solutions help you detect such risks early.
Comparison of Tensiometer and Soil Moisture Sensor
There are different soil moisture sensor technologies in the market besides tensiometers (TDR, FDR, Capacitive, etc.). However, the biggest advantage of tensiometers is that they measure not the "amount" of soil water, but its "availability" for the plant.
While 15% moisture in a sandy soil might be sufficient for the plant, 15% moisture in a clay soil means the plant has reached the wilting point. Since the tensiometer measures the tension felt by the plant root regardless of the soil type, it does not require a separate calibration for sandy or clay soils. The digital tensiometer solutions offered by Esular combine this physical accuracy with the speed of the modern world.
For more technical information, you can review authoritative sources such as the FAO Irrigation and Drainage Guide.
Transitioning to Irrigation Automation with Esular
The data coming from the digital tensiometer can be a monitoring tool on its own, or it can be the brain of a full-scale smart irrigation system. The Esular Smart-Agro series analyzes the cbar values coming from the sensors and sends commands to the valve control devices. It opens the valve when the soil reaches 45 cbar and closes the valve when the moisture drops to 15 cbar.
This level of automation not only provides water savings but also ensures the plant remains in the most ideal moisture range regardless of day or night. You can start implementing this technology in your field immediately with our professional soil moisture sensor packages.
Conclusion: Catch the Future with Scientific Irrigation
A tensiometer is a tool that allows you to hear the silent cry in the depths of the soil. For every modern producer who wants to go beyond traditional methods, protect water resources, and maximize efficiency, this technology is not a luxury but a necessity. The digital tensiometer and Smart-Pressure sensors developed by Esular with local and national resources are one of the most powerful tools that allow the Turkish farmer to compete with the world.
Remember, the best yield is obtained not with applications based on estimation, but with measurable and manageable data. Listen to your soil, digitalize with Esular.
For more information and product options, you can visit our product page.